Email Xpert
Mozilla Thunderbird on Windows
First, you'll need to download and install Thunderbird.
Step 1: Open Thunderbird
- Launch Thunderbird on your computer.
Step 2: Add a New Account
- If opening for the first time, click on a new tab will open titled "Set up Existing Email Address".
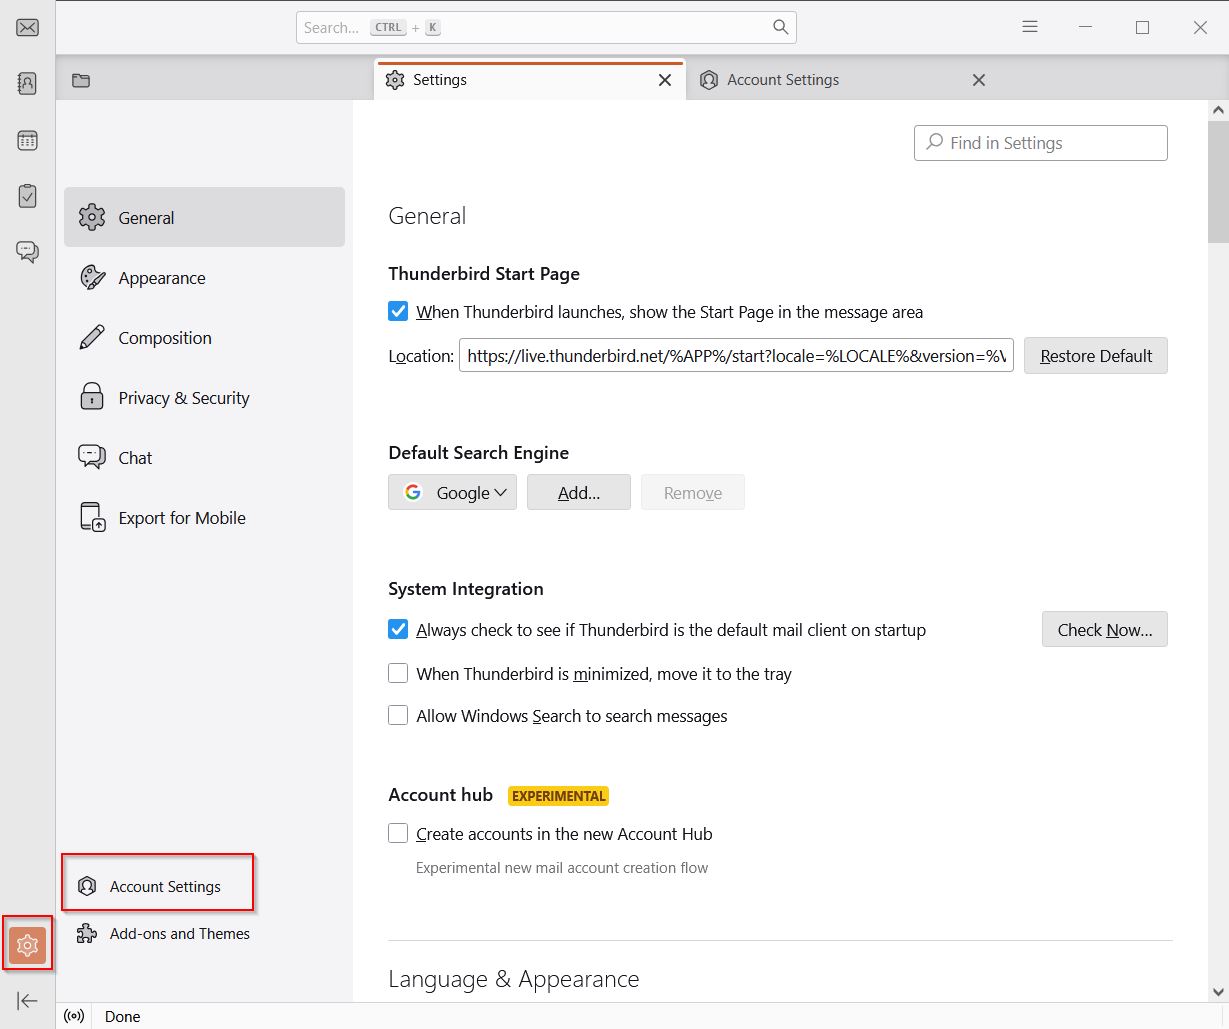
- If you already have an account setup, click on the
Settingscog at the bottom left of the Thunderbird Window and thenAccount Settings - Click
New Accountand selectEmail. This will open "Set up Existing Email Address", as above.
OR
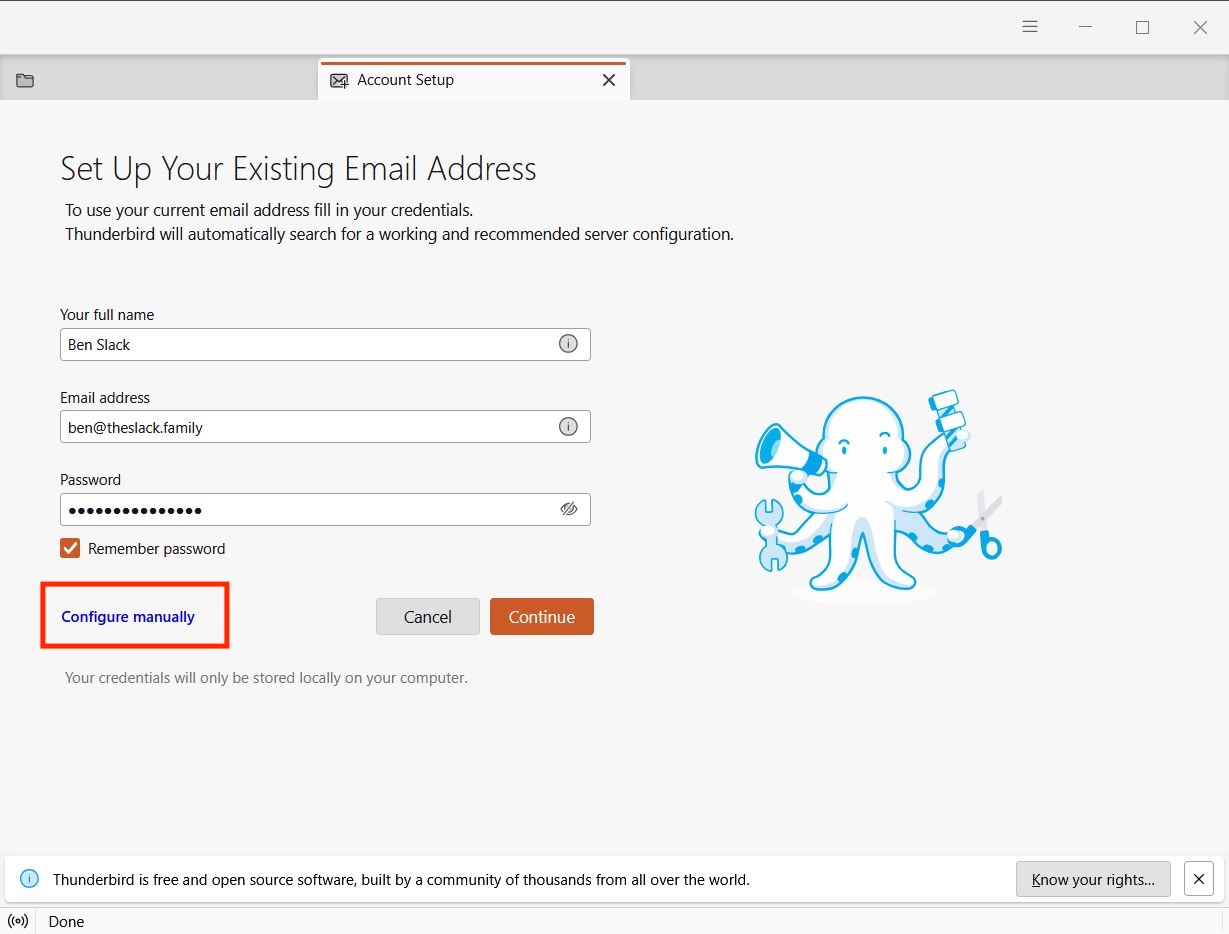
Step 3: Enter Account Details
- Enter your name, email address (
my.new@email.address), and password. - Tick
Remember passwordto save your login credentials. - Click
Configure manually..
Step 4: Choose IMAP
- Select
IMAPas the account type forIncoming Server.
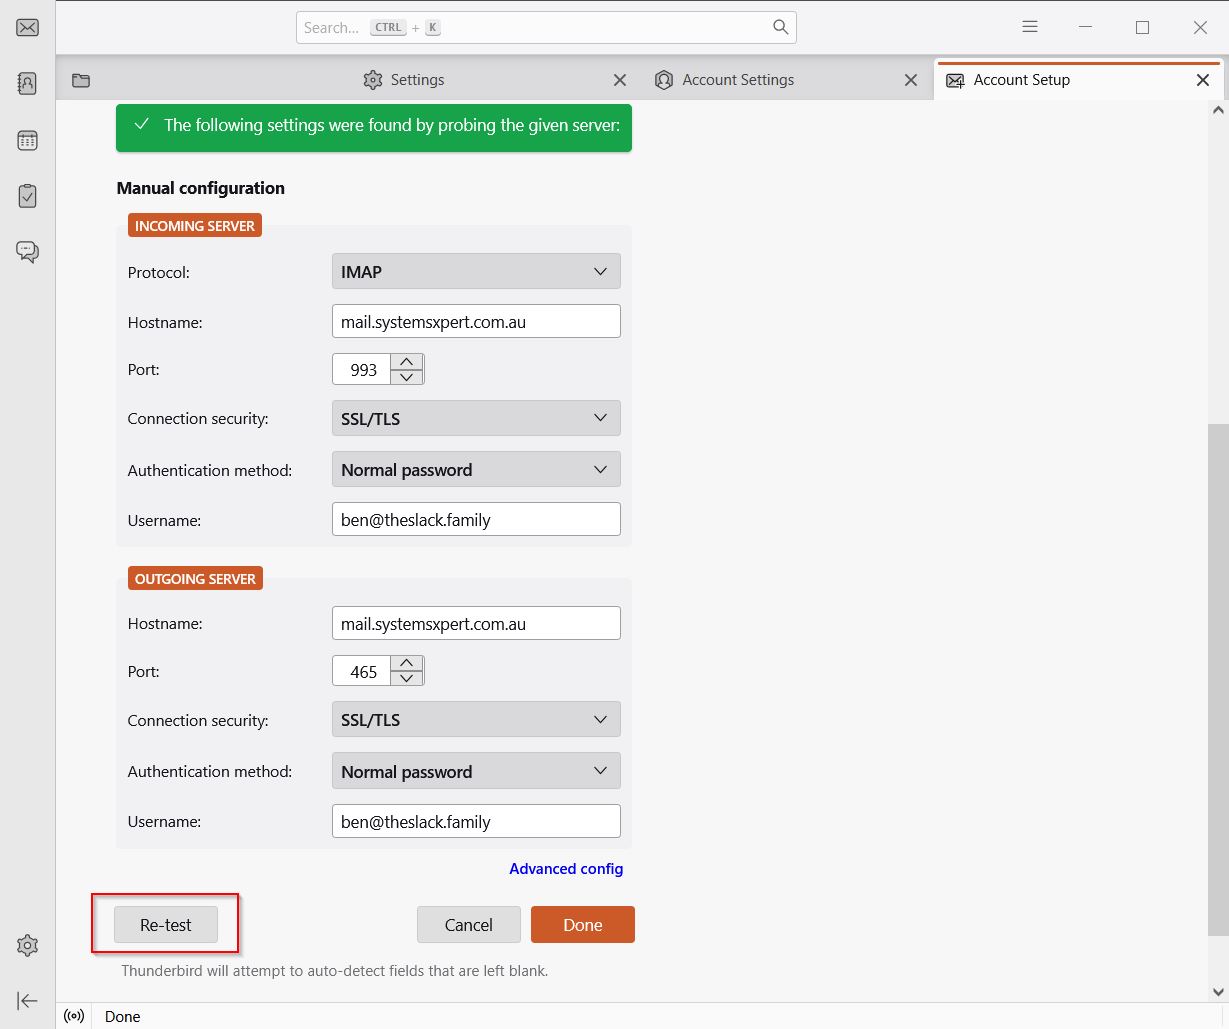
Step 5: Configure Incoming Mail Server
See image at Step 4.
- Server:
mail.systemsxpert.com.au - Port:
993 - Encryption Method:
SSL/TLS - Authentication Method:
Autodetect - Username:
my.new@email.address
Step 6: Configure Outgoing Mail Server
See image at Step 4.
- Server:
mail.systemsxpert.com.au - Port:
465 - Encryption Method:
SSL/TLS - Authentication Method:
Autodetect - Username:
my.new@email.address
Step 8: Test Account Settings
See image at Step 4.
- Click
Re-testto verify the settings. - If successful, a green prompt will confirm the settings.
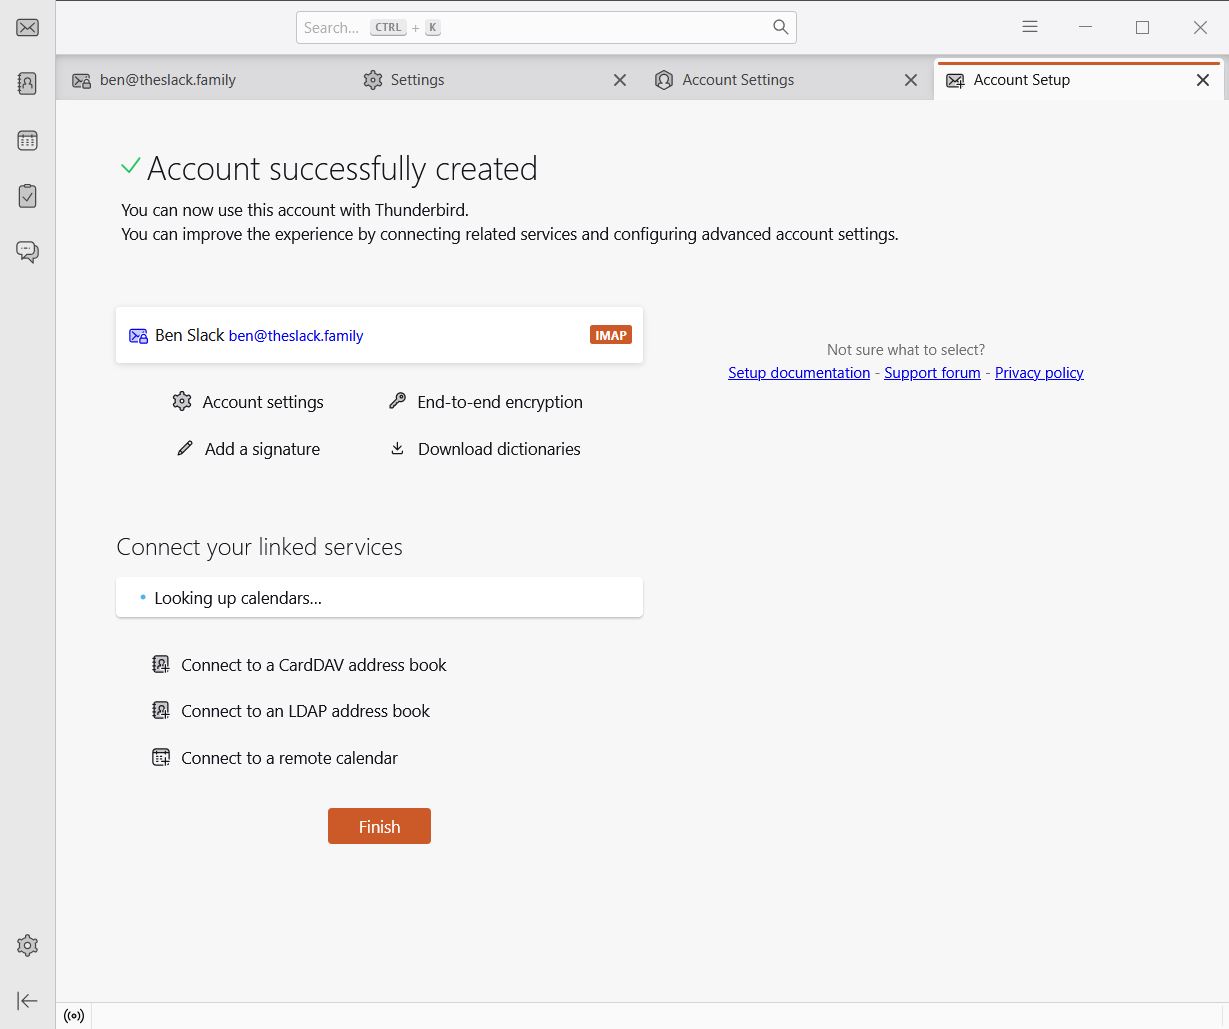
Step 9: Finish Setup
- Click
Doneto finalize the setup. - In the same tab you should get a page titled "Account successfully created".
- Click
Finishto start synchronizing your emails.
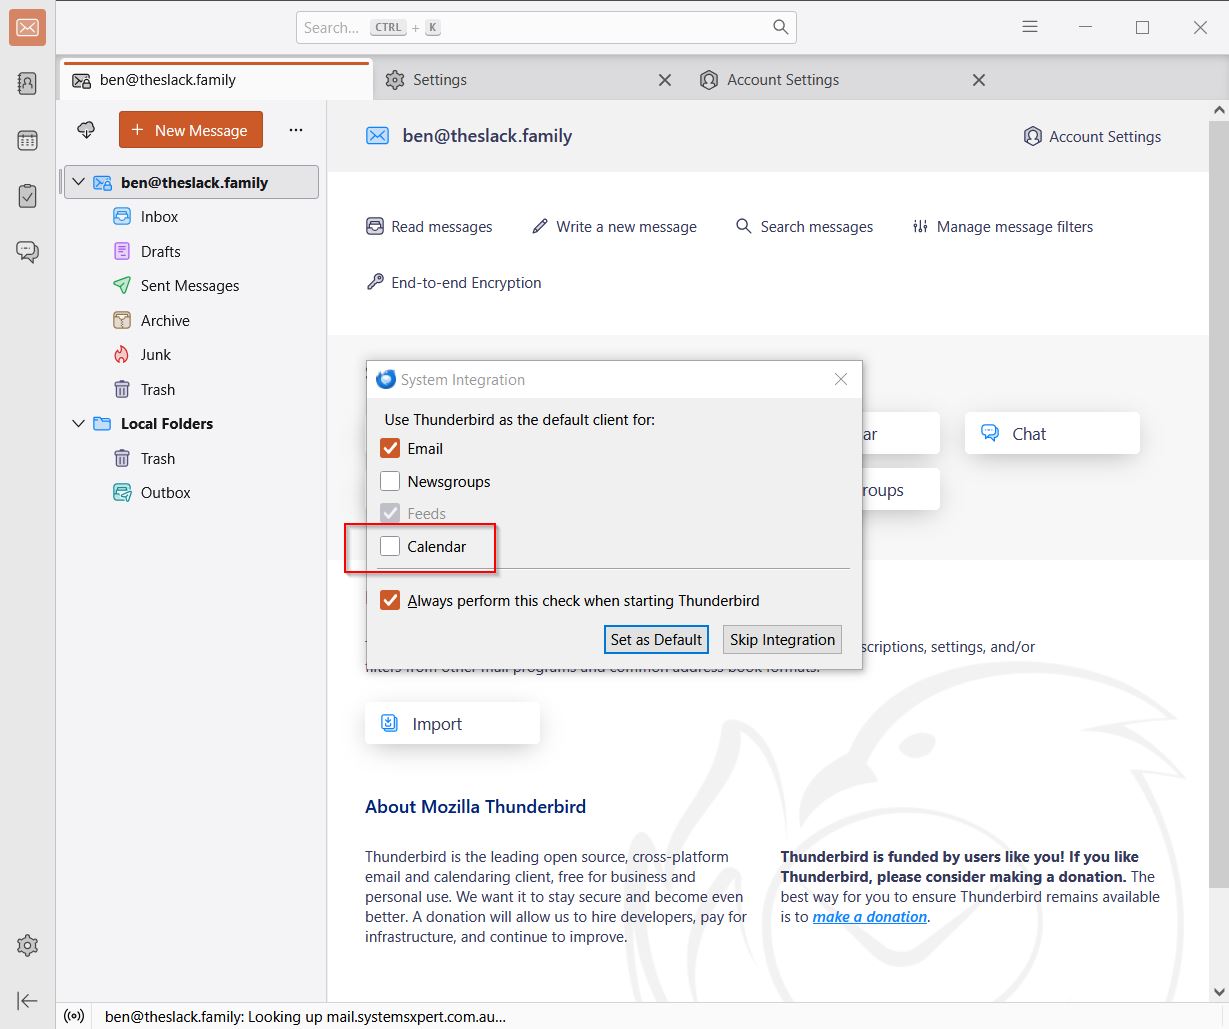
Step 10: Integrate Calendar (optional)
- If you wish to use Thunderbird to view and manage appointments in Thunderbird's built-in calendar, check Calendar. This is not really recommended unless you don't already have an online calendar and are using Thunderbird for Android.
- Thunderbird provides instructions for syncing your Thunderbird Calendar with your Google Calendar, if you are using that service.